Showing posts with label Sewing. Show all posts

Monday, August 8, 2011

Day 221 and Wide


A scarf needn't be narrow. In fact, the wider the better really because extra fabric makes for greater versatility! If your scarf is particularly wide, it doubles as a shawl or a wrap. Certain widths make it usable as clothing instead of just accessories.

I also happen to appreciate asymmetry. This particular fabric was a slippery polyester probably designed as a second layer for a skirt. The filigree you see is only on that side of the fabric. The other end doesn't have a defined edge motif. I'm okkay with that. I know that both ends don't look the same and I don't think they have to. If I want to show off the filigree side and not the overall pattern side, that's my prerogative. Vice Versa too while we're at it. In fact, I think that the one edged fabric makes for greater versatility as well! Just as the width can allow you to wear a scar fin different ways, the fabric pattern will allow those different ways to appear differently based on which pattern is visible. All the more fashion options for you. :)

Also does anyone else feel like prerogative is about the weirdest spelled word you've ever seen? It looks so clashy against itself, doesn't it?

Saturday, July 30, 2011

Day 211 and Fire Hazard


I learned today that trying to do crewel embroidery on crocheted fabric is ... well, it's folly. I'm a little bit ashamed of the end result. You can't even tell it's a fire hazard logo except for the fact that you read the title. I suppose a much smaller gauge would have helped me out a lot, but you live, you learn. Right? Right. I probably should have gone with something a little less detailed like an initial.

Anyway, what I'm saying is, don't be afraid to try something because it might not turn out. As with most yarn crafts, you can always just tear it back apart and try again another time.

Wednesday, July 20, 2011

Day 201 and X


Ah, embroidery. It takes so many forms and this form happens to be cross-stitch. Before I learned to knit, cross-stitching was my preferred form of domestic art. I'm now a yarn convert, but every now and then, it's fun and relaxing to visit my roots.

Here we have a very plain, very blank, very boring, very inexpensive scarf which can be found at any dollar store in America. Not much of a statement the way it is, but it does offer a very large canvas! Depending on the size of the design of you're cross-stitching, it might be prudent to purchase some waste canvas which is an even-weave fabric that can be used as your grid and then pulled away one thread at a time when the design is finished.

For this project, I picked out a couple of skull designs from Makoto's Cross-stitch Super Collection and since they're a little bit punk and a little bit funky, I went ahead and pictured the grid in my head. I had waste canvas on hand, but I rather like the slightly uneven look for these two motifs. Since the background fabric isn't on a grid of it's own, you could rotate each design in any direction at all if you so chose. Just remember that the thicker and denser your material, the sharper your needle needs to be. This scarf was a thin woven fleece and I got away with using a blunt embroidery needle. If I had been working on a herringbone fabric or through more than one layer, I would definitely have needed a sharp crewel needle and a thimble to save my little piggies.

Saturday, June 25, 2011

Day 176 and Hoho


I only wish that I had used brown or black fleece. Hindsight is twenty twenty. I originally had hoped to figure out a quick new way to make a little ruffle. All I was doing was zig-zagging some strips of jersey knit across the path of the sewing foot. Upon getting through the first ruffle, I had to stop because of how strongly I was reminded of the little chocolate snack cakes.

Okkay, yes, I know: Hohos have the swirl on the inside, but growing up I associated every hostess snack with the exact same term. This scarf looks more like the cuppy cakes but I'm calling it Hoho anyway!!

Friday, May 13, 2011

133 and the Buttonhole


This has been a red letter day in Amanda's sewing practice of destiny!!!

I have successfully completed my VERY FIRST BUTTONHOLE.
(At this point I imagine Kermit the Frog running across a stage with his arms flying in the air yelling "YAAYYYY!!!!")

Yes. This is a keyhole scarf in which the keyhole is very simply a buttonhole. It's important to use smooth slinky fabric or you might have a bit of trouble getting the fabric through the keyhole. Rayon and silk are good choices.

The buttonhole wasn't all that hard either after I did a few practice holes on some scrap fabric. Every machine works differently and the key to doing it right is reading the directions. It's actually as simple as looking at the stitch guide knob. The arrows and letters act as a list of what portion of the buttonhole should be made in which order.

As for the buttonhole sewing foot: I used mine. I know that my mother doesn't and she's a much more accomplished sewist than I am, but it was very useful for me to stop when I needed and to turn when I needed and not to get confused about which leg came next.

Once the button hole is sewn the big step was... oh geez... cutting the fabric!!! Not to worry. A decent buttonhole holds in the frays and the legs are far enough apart not to worry too much about accidentally cutting the stitching. Beginner machines, I'm told, are particularly good about having wide areas between the legs through which to cut the hole. Give it a try! It's a very fast and quite handsome way to make a light decorative summer scarf!

Sunday, May 8, 2011

Day 128 and Gathered


I need much more practice on my sewing machine, but a little experimenting got me this lovely ruffle. Using a zig zag stitch, I sewed over the top of a thin elastic cord while pulling on the elastic. It didn't work at all for me until I used the zipper foot, and even after that I had to do some gathering by hand.

I do enjoy the finished result and I hope that more practice will make me even more fluent with my machine.

Thursday, May 5, 2011

Day 125 and Rayon


I found this glorious piece of printed rayon fabric who knows how long ago, but as an extremely amateur seamstress I have no experience with it. As with any craft or skill you can't get better unless you practice.

So the great thing about rayon is that it's construction is just like jersey knit. You can cut it and it won't unravel. Even better, it doesn't roll up. But just cutting a piece of fabric doesn't seem like much of a project, so I decided to put a border on it. Rayon is a very slippery fabric and a stretchy one as well. Since I don't know any better, the best thing a novice like me could hope to do in just one evening was a faux border. And this works with any fabric that doesn't unravel too.

Set your machine to a short and slender zig zag stitch and top stitch about an inch from the edge all the way around. It's simple and it's completely brainless, but it gives an otherwise unfinished piece of fabric a completed look. For fabrics that aren't so stretchy, a straight stitch would be fine, but I needed a little bit of give to prevent the rayon from puckering up and that's why I think a zigzag works a bit better in this case.

Monday, March 28, 2011

Day 87 and the Tuft


So maybe you're not feeling quite so bold as an entire mane. That's okkay. You could go with something a little more subtle like the tail tuft. Here is a nice plain scarf that's been kicked up a notch with some of our crazy fur yarn, but only a little bit at each end. You can always work your way up to the top of the pride. ;D

Grab yourself any plain scarf. It could be knit or crochet or fleece or purchased. Knit or crochet a rectangular panel for each end that will match the width using whatever fur or eyelash yarn you've chosen. Sew it on with matching thread. It doesn't even matter which way the stitches are oriented as long as it looks nice to you. Couldn't be quicker or easier! It's also a great way to use up that last half ball of fur yarn that you might not otherwise get to use.

Wednesday, February 23, 2011

Day 54 and the Pocket


You all know I'm a rather poor sewist. I'm working on it, but to really get any better, I think I need more patience and a teacher. Still, I can accomplish simple things! Using fleece as a background and fleece as a pocket, there is very little preparation needed and the execution is ridiculously easy.

Here I picked a zany pattern and cut a rectangle to the length and width that I wanted. Then I rotated the pattern and cut a pair of squares to be the pockets. I didn't even measure. They were just barely smaller than the scarf.

I left a VERY wide seam more than an inch and without folding or pinning sewed right around three edges. The top was left unsewn of course so that it was the opening of the pocket. I did the exact same thing on the other end of the scarf. Then, I took a pair of scissors and fringed one flap of the seam I just made around all three sides. It hides any imperfection in sewing such as curvy seams and it makes the pocket stand out so it's clear that it's a pocket.

Stick your hands in on cold days or carry small items like your music player or your lunch money.

Saturday, February 12, 2011

Day 43 and Lace

Such a very delicate and feminine addition to a wardrobe is this scarf! It wouldn't keep you warm, but it might make you want to warm up to your sweetie.

A different fabric requires different handling. Always, always, always have scrap to practice on when you're working with a delicate fabric like lace. I found I had to loosen the tension all the way to zero on my machine in order to comfortably work with the lace. If you still have trouble, you can sandwich the lace bits between tissue paper and when you're finished sewing, rip the paper away.

Here I used two pieces of a lace panel and laid them side by side. I overlapped just the very edges and sewed very slowly so that the two were connected.

Like I said yesterday, practice practice practice and keep trying new things.

Friday, February 11, 2011

Day 42 and HemmingWay


Yes, it's a pun. As with knitting, crocheting and any piece of handiwork, learning to use your sewing machine and master all of the techniques that can be accomplished with it take practice before you master them. I am not yet proficient with mine, but every time I use it I know I'm getting a little bit better.

Some types of fabric are a little bit tricky to work with. A weave for example unlike a fleece will ravel and fray at the edges if not kept in check. A simple folded hem might be fine for most fabrics, but for a loose weave it might still fray.

For this plain rectangular fabric scarf, I needed to roll the hem. There are sewing machine feet available which will do it for you, but if you don't have one, then the easiest way to think of this hem is twice folded hem. Fold and iron it as if it were a plain hem. Fold it one more time to trap the first fold on the inside and iron and pin if needed. Sew right on down and you're done!

Saturday, February 5, 2011

Day 36 and Menswear


Edit: Found it! The camera was under a couple of scarves. In hindsight, it was pretty obvious. And darn it, I am having trouble taking decent pictures lately :P

ACK I somehow managed to lose the camera between yesterday and today! I'll search all over tonight.

Today's scarf is already neckwear, but two pieces of neckwear made into one. Yes, those are men's ties. Use a ladder stitch to sew them side by side and I hate to say it, but you're pretty much stuck with hand sewing for this.

I placed the skinny end of one by the fat end of the other so the scarf was symmetrical, but there's no reason you can't have a fat on one end and thin on the other end wedge scarf. I think this is also ripe for embellishment. It's really just begging for some crazy quilt embroidery along the edges.

Wednesday, January 26, 2011

Day 26 and the Tidy Scrapper


Maybe insanity isn't for you. I had a couple old sweatshirts that haven't been getting any love in a long long time. They deserve a second chance as a nice scarf. Just like the Scrapper scarf, you can use bits and pieces from any shirts that you happen to have, but this time you will actually be cutting them into nice neat rectangles just like the Double Faced Flannel.

The length of the rectangles doesn't matter as long as the width remains the same. That width should be twice as wide as you want the finished scarf. Cut as many as you need in as many lengths as you please and as many colors as you have. If you have characters or words on some of your scraps, take care to align the images so that when the scarf is worn, the images are right side up. The bottom edge of the image should be closer to an end of the scarf rather than the middle.

Line up the matching widths of the pieces with the right sides facing each other. Sew a seam (anything from a cm to an inch. Whatever you're comfortable with). Open the fold and align another piece of fabric and seam. Keep going until you've used all your pieces.

Now, fold the very long piece of fabric in half long-wise (hot dog style) and line up the long edges. Sew the entire length and turn the item inside out. I used sweatshirts, so ironing wasn't going to do much, but if your fabric is cotton or linen, you might want to give it a light press at this point to tidy up the seam.

Just as you did for the double faced fleece, you'll need to clip the corners, turn in the edges and sew them shut. If you use sweatshirt, you'll want to leave about a centimeter unsewn on each edge. Most home machines just can't feed such a thick fabric and you'll get a nicer seam by stopping short at both ends.

Tuesday, January 25, 2011

Day 25 and the Double Faced Flannel


Bare minimum of sewing is used for this project. If you have a sewing machine, you'll find this goes a lot faster. This is a good project immediately following the Scrapper scarf. That was crazy, but this is very sane.

Cut 2 pieces of flannel the same size and shape. Go for a rectangle if you're new to sewing. Line both pieces up together with wrong sides out and sew around three edges leaving the one short edge open. Clip the corners and turn the whole thing inside out. Clip the corners of the open edge and tuck the open edge to the inside. If you're a perfectionist, sew that last seam by hand with invisible stitches. If you're not as picky, just sew the edge shut with your machine. There will be a slight hem, but if you're careful you can make a very neat finish.

I cheated a bit here and cut one piece of flannel twice as wide as I wanted it and only sewed 2 sides before turning. The end result is the same, but I'm a big old cheater ;)

Monday, January 24, 2011

Day 24 and the Scrapper


PUNK! Emo? I'm not really sure what this could be called, but it's as deconstructed as a t-shirt could possibly get! This is an excellent first project for a beginning sewist with a rocker's spirit. Your rebelling teen would actually be proud to wear this crazed, messy scarf. (Also I wish I too was cool enough to wear it)

Cut up a couple old crummy t-shirts into chunks. They don't have to match and they don't have to be neat cuts. Overlap the edges. Sew the pieces together using some of the weirder utility stitches that are available on your machine. A bunch of different hem stitches are usually on even beginner model sewing machines. If you sew on top of the fabric instead of an edge you get stitches that look like lightning bolts, a heart monitor line, a sawtooth wave. Use thread that completely contrasts the fabric.

When all the pieces are sewn together, embellish by sewing at strange angles through the fabric right over your other stitches. Change the thread color if you're so inclined and sew even more criss-crossing lines. Stick a couple safety pins or kilt pins in that sucker and tack a few band badges all around. Radical.

Wednesday, January 19, 2011

Day 19 and the Camoflage Blankie

Remember Day 3 and the No Fuss Fleece? Maybe you want just a little tiny bit of fuss after all. One of the most basic stitches that every knitter, crocheter, crafter, but NON-sewist needs to know is the blanket stitch. It's a terrific stitch for finishing edges that don't need a finish for the purposes of stability.

Cut your fleece to the size and shape that you want it. You'll need a sharp needle. Avoid using any yarn that is thicker than fingering. The fleece is often too tightly knit for a worsted weight yarn and you'll find this to be more of a chore than you were expecting. You should also avoid using a piece of yarn that is too long. It's better to have more ends to weave in than to have a ragged looking yarn that has been pulled through too many times or a wicked tangle.

There are lots of decent tutorials on youtube since my wordy description would probably be useless for this.

Saturday, January 1, 2011

365 Scarf Project

2011 marks the start of a new year, and in my case a new project! I'm calling it

The 365 Scarf Project

Mission: To create 365 different scarves over the course of the year and share one scarf daily via this blog. To sometimes provide tutorials as well so others might create scarves of their own.

Vision: To snuff out the dreaded "crafter's block" in myself and anyone who wishes to follow the project. To nurture a sense of pride in one-of-a-kind handmade goods. To expand my own sense of fashion, art, and unconventional thinking. To encourage individuality.

Why?

One might ask what drives me to set such a lofty goal. I might go completely gray-haired before I could think of an answer that made even a lick of sense. I guess the most straight-forward answer is this: Because I think I can do it.

It's going to take more dedication than I've ever put into a project. It's going to take more inspiration than I've ever intentionally had to search out. It could possibly consume every waking moment that I don't spend at my place of employment.

Still, I think I can do it. Oh sure, I might have to start a scarf for March and October this very moment, and I might have to have ten projects going at any one time. I might have some daily posts in which I'll be forced to show some *gasp* mediocre work. I might have to buy a pattern now and then. These are risks I'm willing to take!

Necessary Information

In each daily post I intend to include the following.

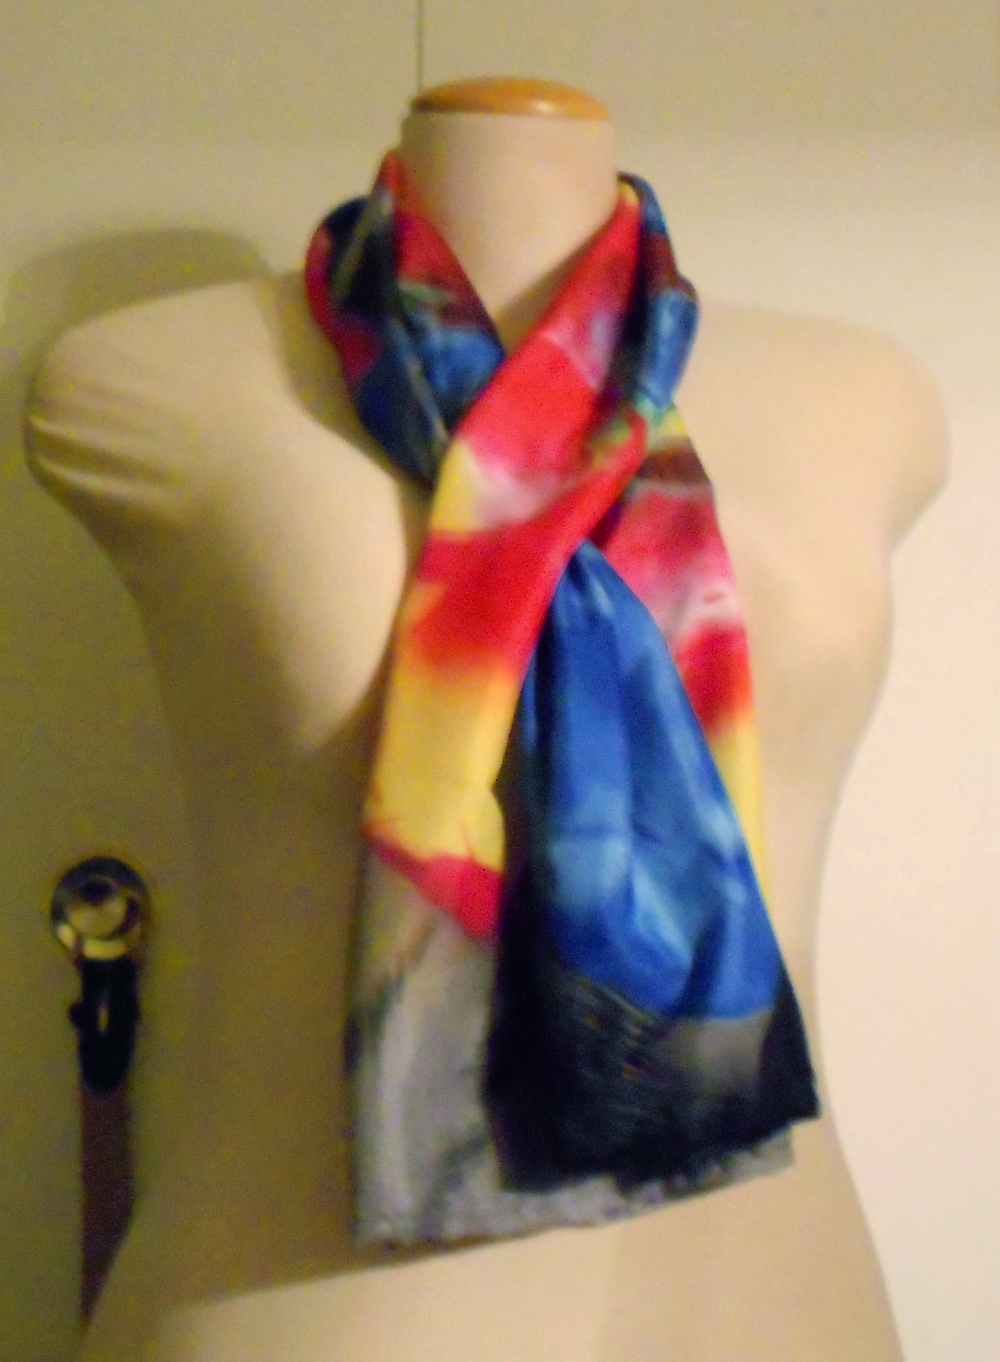
A photo: I will pray and pray and pray that my camera holds out. I will pray and pray and pray for bright sunny days for best picture opportunities. I will post a photo even if I can't get a good one! There's always the camera phone as a last resort!

A title: Every scarf deserves a title. A generic title is still a title, but I will put forth every effort to at least use an adjective. It might be only a stitch pattern. I say that's acceptable!

A method of construction: I will categorize every scarf into one of the four main categories of knitting, crocheting, sewing, or crafting. Since it is my vision that followers will be able to make scarves of their own, I will provide enough information such that a similar pattern or design can be hunted down or self-designed. Sometimes I will provide a full pattern (learning about proper pattern making along the way!)

Support and Inspiration

Let's face it, folks. There is a LOT of room for failure in this project. I realize it and I am ready to face it, but if I can get a hand now and then, I will be ever so grateful! Please, offer your support in the comments of this blog. Send me links to images and designers that inspire you and might inspire me via twitter ( http://twitter.com/nerdytogether ) Send me photos when you decide to make one of the daily projects. It gives me inspiration just knowing that someone is enjoying the creativity along with me.

Tuesday, December 21, 2010

Let's Get Started!

I've a giant project in the works for the new year, friends!

I know I usually neglect my blog, but starting on New Year's Day, it will be an integral part of keeping me to my goal.

Anticipate daily updates throughout the year and it will be of greatest interest to fellow crafters, knitters, and crocheters. I'm really going to need support with this one, so leave comments, leave links, and maybe leave photos too once it's well underway.

Here's to creativity in 2011!! (You'll find out the project soon enough!)