Tuesday, May 31, 2011

Day 151 and Crosses


I was checking out the book "Knitting Wrapsody" by Kristin Omdahl and while I didn't have time to make one of the very loevly projects in the book, I did spot a stitch pattern that I wanted to practice on. It's used on the front of the infinity wrap and gives an effect not terribly dissimilar to broomstick lace in crochet.

In the end, I wish I had time enough to do a few more repeats, but it's summer now and it's too hot for a wide scarf anyway XD

Monday, May 30, 2011

Day 150 and Sky Diving


Would it be wrong to admit that I picked blue for this scarf just so I could give it the above title? Well if it's wrong, I don't want to be right.

I wanted to go a little punk, but it's so thick and fluffy, I'm not sure I pulled it off. It was still good practice on making drop stitches stop dropping where you want them to. I'm sure there are a bunch of ways to make it happen, but the way I do it is as follows.

  • I knit normally until I come to the place where I want my dropped stitch to end.
  • I do a M1 (make one) stitch using the bar in the stitches below followed by a k2tog.
  • I knit normally until I have the length of the drop stitch I want.
  • I drop the stitch and continue knitting normally
So far, the drop always is exactly as long as I want it to be. I do notice that the fabric gets significantly wider when using such very large stitches as I've been using. I'll have to keep that in mind next time around.

Sunday, May 29, 2011

Day 149 and Color Wheel


I don't do much color work and I've been working on rectifying it! Right now, I'm still not very secure in my abilities, but I thought maybe this would be a logical early entry.

Primary colors red, yellow, and blue are supposed to be able to combine to create a nearly complete color spectrum. I held the yarn double for each of the solid portions and held one yarn of each color for the mottled areas. A thinner yarn would have given a better effect, but I work with what I've got. The very thick fabric wasn't much for draping so I chose to keep it short and snug. 2 worsted weight yarns held together make for a very warm mouth, chin and nose covering for a cold outing. This scarf... uh... cowl? hmmm... muffler? Well anyway, this wearable color wheel will be keeping someone's face very warm come winter time. :)

I do happen to notice that the blue are red make the most convincing purple and the red yellow make the least convincing orange. I might have to do some research into ratios of color when held together.

Saturday, May 28, 2011

Day 148 and the Chain of Love


I was tooling around online and trying to find a nice little heart motif that didn't have those rather annoying eye holes from the shell that is always used for the heart bump.

"Nuts to this!" says I! "I'm sure I could come up with my own tiny heart that better suits me!"
So I did! I really need to make a video of this because the heart bumps just don't seem to translate very well, but here's my best shot at it.

Any size crochet hook with a matching weight yarn can be used. (American abbrev.)

Row 1: Chain 2. 1 SC into the second chain from hook. Turn. (1 stitch)
Row 2: Chain 3. 4 DC all into the SC. Turn. (5 stitches)
Row 3: Chain 3. DC once into every stitch across (including the very first!). DC twice into the top chain of the previous row. (7 stitches)
Row 4: Chain 2. Yarn over, pull up a loop in the second stitch, Yarn over, pull up a loop from the third stitch (5 loops on hook), Yarn over and pull through all 5 loops. Chain 2, slip stitch in the next stitch. 1 heart bump complete. Chain 2, yarn over, pull up a loop in the next stitch, yarn over, pull up a look in the next stitch, (5 loops on hook), yarn over and pull through all 5 loops. Chain 2, slip stitch in the top of the chain from the previous row. Give these bumps a little tug to round out the shape.

Repeat these 4 rows as many times as you want to create a chain of these hearts. The hearts will always face the same direction because the row repeat is an even number. It makes a cute scarf, but as a motif, I'm already thinking about where else it would be cute such as the border of a baby blanket or as a pretty wreath for the front door.

Friday, May 27, 2011

Day 147 and the Bow


This was so fast and so easy and when worn I was blown away with how much prettier it ended up than in my imagination. It's nothing but rectangles so even a complete beginner can make this Bow Cowl.

1 ball Caron Simply Soft
size 15 needles
Tapestry needle

Cast on 20.
Row 1: K1, P1 to the end of the row.
Row 2: P1, K1 to the end of the row.
When you've knitted 22 inches worth, bind off and sew to the beginning seam. You might also choose to graft this part.

Cast on 10.
Every row: K1, P1 to the end of the row.
When you've knitted 10 inches worth, bind off and sew to the beginning seam trapping the first bit of fabric inside the loop. Again, you might also choose to graft this part.

Arrange the fabric so the seams are hidden and enjoy! :D If you scale this down a tiny bit it would also make a very lovely headband earwarmer.

Thursday, May 26, 2011

Day 146 and the Furkerchief


If the Boy scouts of America were a little more fabulous and a little less outdoorsy, I think this would be the kerchief that they would wear :D.

SO easy and a great way to use up some of that wicked boa yarn that every knitter has grabbed or been gifted at some point after the love has faded.

Furkercheif
1 ball bernat Boa
Size 15 needles
tapestry needle

Yarn is held double throughout
Gauge is not important, but the resulting fabric should not be delicate or flimsy.
Around 3 stitches per inch.

Cast on 4 stitches leaving a 12 inch tail.

(Increase section)
Odd numbered rows: Knit
Even numbered rows: Knit into the front and back of the first stitch, Knit across the remainder of the row.
Complete these 2 rows until you have 12 stitches.

(Even section)
Knit every row. Do this until your piece measures 15 inches from the cast on edge.

(Decrease section)
Pay attention to the way your fabric is angled at the beginning section. Make sure that the straight edge is on your right and the angled edge is on your left when you begin decreasing.
Odd numbered rows: Knit to the last 2 stitches, K2tog
Even numbered rows: Knit
Complete these 2 rows until only 4 stitches remain. Bind off leaving a 12 inch tail.

(Ties)
From the remaining yarn cut 4- 24 inch strands. Thread 2 strands through each point of the fabric and center them. Using the cast on and bind off tails and the new strands, make a braid 8 inches long. Tie a knot and cut the excess.

Wednesday, May 25, 2011

Day 145 and Gamer


Have you ever heard of Game Knitting? Well, have you ever heard of a drinking game? Okkay, combine the idea of a drinking game and knitting and you have game knitting. There's no drinking actually involved.

Basically, you set up a tv show or a radio show or a movie that has a lot of predictable behaviors. And you decide which of those behaviors are going to trigger a game knitting action. For this scarf, I picked out the Harry Potter movie series. My triggers were any time anyone said "Harry, Harry Potter, Mr. Potter" etc, every time the word "muggle" was said, and every time a wand was used to cast a spell. I cast on 40 stitches and worked in 2 by 2 ribbing at my normal pace. When one of these triggers happened on screen, I made a 7 stitch nupp into whatever the next knit stitch was. I ended up with a very knobby knotty cowl with quite a lot of character! Since I was watching Harry Potter, I was strongly reminded of the "wooly hats and scarves" that Hermione made during the fourth book.

Tuesday, May 24, 2011

Day 144 and PUFFS


Kevin's scarf turned out to be terrific practice on the puff stitch which is the star and main... well ONLY attraction and complete headliner in this cowl! This was an easy and very fast pattern and it's on ravelry, so check it out for yourself. I used an entire ball of Bernat Boucle (5 oz) and it ended up being the perfect amount for 6 rows of this pattern. I enjoyed making it very much!

Monday, May 23, 2011

Day 143 and Kevin


This scarf was the result of the very distinct and often unusual bond between designer and laborer. In this case Kevin was the unwitting laborer. I hauled him to the yarn store and said, "CHOOSE!!" I hauled him back home and laid out stitch dictionaries and said, "CHOOSE!!" Whatever he choose, I crafted. No questions were asked. No complaints given.

He definitely picked out a yarn I would never have chosen on my own and the stitch pattern was also one I would have passed by. At first I found it to be an excruciating project, but it's kind of grown on me. I'm glad I did it. I had a lot of good practice with puff stitches and the end result really did end up quite handsome.

Sunday, May 22, 2011

Day 142 and Treasure


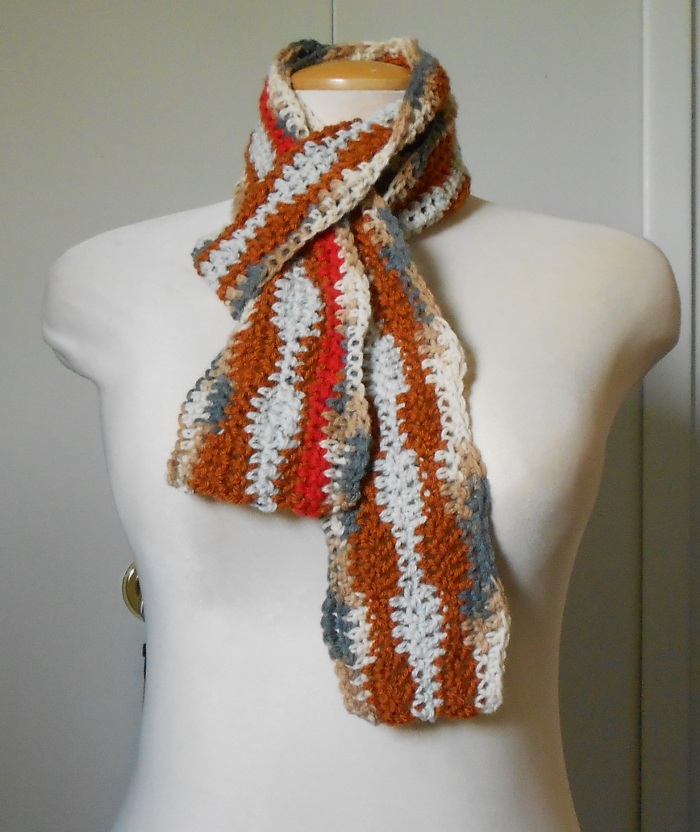
It's very common for a fitted cowl to have buttons. It lends character and structure to the knitwear. In this case, I thought I could do a little bit more. This button flap is completely functional and hides a pocket that could be used for emergency cash or hiding a love note until just the right moment.

Treasure Cowl

2 balls Lion Brand Superwash Cashmere Merino
Size 9 needles
Tapestry needle
2- 5/8 inch buttons
You may find it helpful to use a stitch marker to designate the center stitch.

Less Common Abbreviations
wyif/wyib - With yarn in front, with yarn in back
ssk- slip, slip, knit

Cast on 41 stitches
Rows 1,3,5,7,9: K20, Sl1 wyib, K20.
Rows 2,4,6,8: Purl every stitch.
Row 10: (P1, K19) twice, P1.

Repeat this pattern 12 more times or until the cowl is the desired length. Keep in mind that it will be grafted so must be able to stretch over the head.

Begin button flap.
Row 1, 3: wyif, slip the first stitch purlwise, (k1, p1) 9 times, K1. Place remaining stitches on a holder to be grafted later.
Row 2, 4: wyif, slip the first stitch purlwise, (p1, k1) 9 times, K1.
Row 5 (begin buttonhole): wyif, slip the first stitch purlwise, (k1, p1) twice, k2tog, YO, YO, ssk
K1, P1, K1, k2tog, YO, YO, ssk, (P1, K1) twice.
Row 6 (return buttonhole): wyif, slip the first stitch purlwise, (p1, k1) twice, Purl and Knit into the double yarn over, (p1, k1) twice, p1, Knit and Purl into the double yarn over, (k1, p1) twice, k1.
Row 7, 8, 9 (begin decreases): wyif, slip the first stitch purlwise, K2tog, (p1, k1) to the last 3 stitches, ssk, K1.
Bind off in knit on the wrong side (right side should look like purl bumps.)

Graft the held stitches to the cast on row. Fold the entire cowl in half using the slipped center stitches as the crease. The first and last stitch of every row is to be used as a selvage for seaming. 2 panels away from both sides of the opening using the purl bumps as a guide, sew the front part of the cowl to the back part to create a pocket. The flap will then be in the center of 4 panels worth of pocket. This yarn is a 3 ply so I separated the plies and used just one to sew the buttons in place. You might alternately choose to use sewing thread.

This is so far the most complicated pattern I've tried to write out after having improvised the original. Please let me know in comments if I made any mistakes and I'll do my best to fix them!

Saturday, May 21, 2011

Day 141 and Twisted Stories


The last of the trio, this one was tricky to construct. Again the bumps were lined up, but this time I did a half twist for ever connection. While I was crocheting of course this meant I had to connect half of the bumps during the first row and the other half of the bumps on the return row. It got very cluttered and quite twisted up. The yarn was forced through and around each gap for the first row, but amazingly every twist of the yarn was set right on the return row. I hope to make this again and take pictures of the process and share at some point.

Friday, May 20, 2011

Day 140 and Tangents


Number 2 in the series with no name! Using the same sequence of single and double crochet stitches, I made one repeat of the pattern. Ordinarily the pattern would alternate the sequence so the bumps fit nicely into the divots. To make this version, a new chain was made but for the places where the bumps would touch, a single crochet stood in. The results are clear. The pattern is still very obvious, but instead of fitting together like MC Echer motifs, they parade side by side holding hands along the path of the scarf. Very cute.

Thursday, May 19, 2011

Day 139 and Connections


Get ready for a set of three. This scarf, tomorrow's and the scarf for the day after are all based on the same pattern stitch from 2oo stitches for baby blankets but very very different.

Today is the classic pattern. 4 single crochets and 4 dbl crochets make a lozenge effect when stacked. Alternating stacks gives this lovely wavy appearance which stands out the most when very strongly contrasting colors are used. I did use one variegated yarn, but in the future, I probably would avoid striping yarns as the texture isn't strong enough for my taste.

Wednesday, May 18, 2011

Day 138 and Waves


Crocheting in tall and short stitches in sequence and then reverse sequence gives a pretty undulating effect. Stitches used started with single crochet, then half double, double and triple and then the entire thing in reverse. A couple rows of nice orderly single crochets breaks up the waves and makes the curvy pattern much more clear. This was from Stitchionary 4, but I'm afraid I memorized the sequence and not the name of the stitch.

Before anyone says anything, I didn't realize my color choices were suggestive until after I was done. LOL! whoops.

Tuesday, May 17, 2011

Day 137 and Corners


This was so easy and so fun! I love when basic stitches give such exciting results. This is just granny square corners stacked on top of each other over and over again. Since you need a chain to get you to the next stack, it gives the appearance of a stair step. It's actually an edging suggested in 200 Pattern Stitches for Baby Blankets called granny braid, but in a big gauge it's a scarf all on it's own!

Monday, May 16, 2011

Day 136 and Railroads


Most of the time big stitches are just big stitches. So I was thinking I'd add a little bit of pattern to the big stitches and see if that makes any difference. It definitely does. This was a very simple almost granny technique, but it reads so easily that it opens the doors to many more projects further into the year. It's my big stitches train of thought so I called it Railroads. The lighter color in the center even looks a little bit like railroad tracks! :)

Sunday, May 15, 2011

Day 135 and Back on the Wagon


Way back when I started I admitted that sometimes I have to use patterns because I'm either out of time, have a slight mental block, or just because I like the pattern!

This one is a free Ravelry download called Roda Scarf. It's a short and very fast pattern and I think it's a very cute and attractive use of crochet.

Saturday, May 14, 2011

Day 134 and Post


Crochet is often cast aside as being "not pretty" or "old fashioned" or "retro." That last one can be cool sometimes, but in general I'm sad that crochet is type cast as doilies and ugly 70's clothing.

I think a good way for crochet to make a comeback is for designers to do some exploring with lesser used stitches such as this one. This is the post stitch. You can do it in front or in back so it's as reversible as knitted ribbing and while not nearly as stretchy, there is some stretch that mimics ribbing in a small way.

I know there are many many more interesting stitch patterns that I can practice and hopefully come up with more scarves that don't fall into the not pretty and old fashioned category.

Friday, May 13, 2011

133 and the Buttonhole


This has been a red letter day in Amanda's sewing practice of destiny!!!

I have successfully completed my VERY FIRST BUTTONHOLE.
(At this point I imagine Kermit the Frog running across a stage with his arms flying in the air yelling "YAAYYYY!!!!")

Yes. This is a keyhole scarf in which the keyhole is very simply a buttonhole. It's important to use smooth slinky fabric or you might have a bit of trouble getting the fabric through the keyhole. Rayon and silk are good choices.

The buttonhole wasn't all that hard either after I did a few practice holes on some scrap fabric. Every machine works differently and the key to doing it right is reading the directions. It's actually as simple as looking at the stitch guide knob. The arrows and letters act as a list of what portion of the buttonhole should be made in which order.

As for the buttonhole sewing foot: I used mine. I know that my mother doesn't and she's a much more accomplished sewist than I am, but it was very useful for me to stop when I needed and to turn when I needed and not to get confused about which leg came next.

Once the button hole is sewn the big step was... oh geez... cutting the fabric!!! Not to worry. A decent buttonhole holds in the frays and the legs are far enough apart not to worry too much about accidentally cutting the stitching. Beginner machines, I'm told, are particularly good about having wide areas between the legs through which to cut the hole. Give it a try! It's a very fast and quite handsome way to make a light decorative summer scarf!

Thursday, May 12, 2011

Day 132 and Fettucini


Bah. Blogger was doing some sort of maintenance so I wasn't able to post yesterday. I'm still backdating this since I did finish this scarf for this day and have another for the ACTUAL today.

The yarn I was using strongly reminded me of the noodles made with pureed spinach. The stitch pattern I worked out mimicked it even further!

Spinach Fettucini

2 balls Berroco Suede
Size 9 needles
Tapestry needle

Gauge is not important as long as the stitches are clear and not elongated from being too loose.

wyif = With Yarn in Front
slip = do not twist the stitch. Simply transfer from one needle to the other without changing the orientation.

CO 26.
Rows 1-4: Slip 1 wyif, Knit across.
Row 5: Slip 1 wyif, *k2tog, k2tog, (YO, K1) 4 times, K2tog, K2tog* repeat once more. K1.
Row 6 and 7: Slip 1 wyif, K across.
Row 8: Slip 1 wyif, P across to last stitch. Knit the last stitch.
Repeat rows 5-8 until the scarf is the desired length or until only 4 yards are left on the second ball ending with row 6. My scarf only used about half the second ball.
Final rows as follows:
Skipping rows 7 and 8, complete row 5 once more.
Complete rows 1-3 once more.
Bind off loosely in knit stitch and sew in loose ends.

Wednesday, May 11, 2011

Day 131 and Treaty


What the? This scarf's title has nothing to do with it's construction... and I'm totally okkay with that. I'm nut much for color knitting. I don't have an eye for it and I have pretty poor control over the tension since I never practice, so mosaic knitting is perfect for me.

In mosaic knitting, only one strand of yarn is used at a time and it is used for two rows. Then a second yarn is picked up and worked for two rows. With carefully placed slipped stitches, the two yarns can appear to be sharing space in a single row, but it's all an illusion. It's also a very fast technique. If you can knit either garter stitch or stockinette than this will be a cinch if you follow the pattern carefully.

This is the Toba Cowl on ravelry. It's a free download and only one page. I recommend following the written instructions before the chart unless you're already a fluent mosaic knitter. After one repeat, you'll be able to see how the chart is set up and it really makes a lot more sense then.

Versatile Blogger Award


I've been awarded! Stacey over at The Original Yarn Salad thought I deserved this for my scarf endeavor and I'm so very pleased and thankful! It's actually been almost a week since I was mentioned, but I'm only just now finding a little extra time between knitting, crocheting, and posting pictures to truly appreciate the gesture.

This award comes with a short set of rules to show your appreciation.
1. Thank and link back to the blogger that awarded you the badge. Linky is up there and right here. She's a lovely interesting and generous person. I recommend a follow if you haven't already.
2. Share 7 things about you. You'll find another list a little further down in this post.
3. Award 5 to 15 other bloggers. You'll find a third list even further below!
4. Contact them so they know they've been awarded and appreciated. :) Will do.

7 Facts about me

1. I play a multitude of instruments, but only one of them well. I'm quite good at Saxophone (the 4 major ones are all firmly under my belt). I'm at least high school level on string bass, keyboard percussion, and tuba. I stink fiercely at but still have hand a hand on guitar, trombone, and piano. And I don't think there's really any level you can measure for this, but I play handbells as a soloist at my hometown church. It's really quite entertaining to watch.

2. When I go to restaurants, I never order the same thing twice. Or if I do, it's because I forgot I already had it. I like variety and I like not to be predictable. If there's a server that knows me by name, they are unable to say "The usual today, Amanda?" because for me there's no such thing.

3. I own and ride a push scooter. Obviously I can't ride it every day. It's very inconvenient when it's raining or snowing, but in the spring and fall when the weather is just right, I'm on that thing all the time. Kevin has one too and when we're both off of work, we gallivant around and usually go to East Coast Custard for a baby cone.

4. My favorite strange food combinations always seem to involve peanut butter. e.g. Peanut butter and bologna makes a tasty sandwich. Peanut butter with soy and spaghetti = yum. Ironically, I don't like Reece's Peanut Butter Cups, but I love Reece's Pieces. Go figure.

5. I never do the dishes. Ever. That's Kevin's chore. I'll clean the house and do the laundry and cook the food and wash the windows and pay the bills, but I Don't. Do. Dishes. I suppose if we had a dishwasher I'd do them, but we don't so who knows?

6. Kevin and I have 4 pets, but they are all tiny. Two gerbils named Crushinator and Killbot. Two gray dwarf hamsters named Gimli and Ironman. They live in separate cages side by side and I don't think they know the other species exists.

7. I have 6 teeth fewer than most people and they still don't all fit in my mouth. After much peer pressure, I got braces at the ripe age of 22. My teeth were so squished together, the Orthodontist recommend having some of them removed. Yes, the 4 wisdom teeth obviously, but also the first molars directly behind my eye teeth. I had all 6 removed at once and the braces went in. My teeth got significantly straighter, but they still aren't perfect and I'm completely okkay with it. (Incidentally, the day after the surgery was my aunt's wedding. I brought my own can of chicken broth to eat and I looked like a hamster in all the pictures. Que Sera.)

5 Bloggers that deserve this award:
1. Ariane of Falling Stitches - She does What's Hot on Ravelry which never fails to lengthen my queue, interviews with yarnheads of note, pretty pictures and is an all around nice person.

2. Sinead of Knit Inc. - She's always showing off her Finished Objects and willing to talk about what's going on in her life. She reads way too many blogs and I love her all the more for it.

3. Melissa of SewSweetStitches - Just about the most adorable blog design you've ever seen. She and her daughter are pretty cute too ;). Melissa is always thinking and always sharing and often making me laugh out loud when she goes on an adventure.

4. Sasha of What? No Mints. - She's into science and sharing her own work as much as other people's. She's also often sharing interesting and fun activities that one might find themselves doing.

5. The Gryffindors! - I recently joined a ravelry group in which I was sorted into the House of Gryffindor and we're all competing to earn points by finishing yarn projects. This blog is actually written by a few people and all of them are wonderful. They care about their housemates and help find projects that fit into certain classes with specific requirements to earn the most points. I love them so much, I had to put them in this list!

I hope you find someone new to follow! :)

Tuesday, May 10, 2011

Day 130 and Floof

Red Heart Boutique has apparently pretty recently come out with a new "Yarn" and I'm using the term very loosely, called "Doodles." It is by far, the largest weight of yarn I've ever seen in my life. Larger than using icord as if it were yarn. Larger than t-shirts turned into yarn. This stuff is rope.

It's so large, that you get 2 scarves today. One is literally the yarn, wrapped around your neck. The hank comes tied just as you would expect handspun or laceweight to come with thin yarns holding the rest of the hank in such a way that it doesn't tangle. The thin yarn matches the color of the rope, and it wears as comfortably as if you'd actually done something with it.

Secondly, I case on 3 stitches (3!! Look how wide it is!! 3 only!!) with the backwards loop method and barely made it to three feet, but it's quite soft and feels a bit like a fur stole. This is definitely a situation where the yarn itself is the showcase.

Monday, May 9, 2011

Day 129 and Trio


Using three yarns harmoniously is an excellent way for a beginner to learn color knitting. I'm not much of a color knitter myself, and even a long time knitter like me learned something new while working on this scarf.

Take three equal thickness yarns and use one to cast on. Take the second for the first row of knitting and take the third for the second row of knitting. For each following row, knit using the next yarn in the sequence. You won't get out of sequence because setting up like this gives you only one choice of yarn to switch to.

My recipe was three worsted yarns on size 15 needles. I cast on 11 and worked in moss stitch throughout. It gave an interesting effect. Looking at the fabric from the front looked like an even mix of color. From the side looked like bumpy stripes. Most interesting of all was looking from an angle down the length because it had an illusion effect! All of the purl bumps were visible and the knit stitches disappeared and made a three colored checkerboard. I was pleasantly surprised.

The hardest part about three color one row knitting is keeping your yarns from tangling and I found that rotating your needle at the end of each row should be done in a certain sequence. Lay out the yarns with one ball on your left, one on your right and one right in the center. At the end of the row, rotate clockwise. At the end of the next row rotate clockwise. At the end of the third row, rotate counter clockwise. For every row, bring the new yarn up from behind and you'll not have any annoying tangles, or at very least, it worked for me!

Happy (Belated) Mother's Day

Haha! Meant to post this yesterday, but I spaced!

My mom crochets, but doesn't knit and I love to give my mom knitted gifts because she appreciates them so deeply. I hope if you're a crafter, you can give a little bit of handmade love to your mom or grandmom this day.

This is also a good time to say how much I appreciate the support from my friends and followers as I challenge myself. I especially want to say thank you to Sinead and Yarnsalad! Your comments always make me smile and give me a boost when I'm not feeling so inspired and your blogs are just as enjoyable! Cheers, friends :)

Sunday, May 8, 2011

Day 128 and Gathered


I need much more practice on my sewing machine, but a little experimenting got me this lovely ruffle. Using a zig zag stitch, I sewed over the top of a thin elastic cord while pulling on the elastic. It didn't work at all for me until I used the zipper foot, and even after that I had to do some gathering by hand.

I do enjoy the finished result and I hope that more practice will make me even more fluent with my machine.

Saturday, May 7, 2011

Day 127 and Sakura


Sakura means cherry blossom tree. The lovely light pink petals bloom heartily in Japan and are celebrated during the spring with many festivals and parties and in this case, a scarf.

Sometimes what would otherwise be a very plain scarf is made extremely special with small enhancements. I've used very tiny appliques to represent the blossoms and simple embroidery for the branches. I think it's beautiful and am very proud of how it turned out.

Sakura
Size J hook
Fingering or Dk weight yarn: 3oz. white, scant amounts of black and pink (I used an unlabeled yarn with a slight halo and if I made this scarf again, I would definitely choose another haloed yarn)
Tapestry needle

Begin by chaining 28. DC (dbl crochet american) into the 4th chain from hook and each chain across. *Chain 3, turn, DC in second stitch and every stitch across.* Repeat until the scarf is the length you prefer or until you've run out of white yarn.

Blossoms: Make a magic circle, chain 2, SC (sngl crochet american) into the center 5 times. tighten the circle, slip stitch to join a ring, and tie off. Make between 7 and 12 of these depending on how dense you wish your blossoms to be.

Using black yarn, stem stitch branches on one side of the scarf. Sew the blossoms to the branches focusing on the places where the branches split and the very ends of the branches. I like to leave a couple blossoms unattached to look as though they have come free and are floating to the ground.

Sew in all loose ends.

Friday, May 6, 2011

Day 126 and Faggotted Lace


No giggling now! That's what it's called! This is an easy stitch pattern that makes lovely little lacey ladders. And apparently amazing alliteration. Anyway, cast on any multiple of 4 stitches plus 2 with any yarn you like and any needle that is a good match for your chosen yarn (eg worsted weight would work well with size 8 through size 10 needles)

Every row is as follows: *K2, K2tog, YO* repeat ending with K2.

Thursday, May 5, 2011

Day 125 and Rayon


I found this glorious piece of printed rayon fabric who knows how long ago, but as an extremely amateur seamstress I have no experience with it. As with any craft or skill you can't get better unless you practice.

So the great thing about rayon is that it's construction is just like jersey knit. You can cut it and it won't unravel. Even better, it doesn't roll up. But just cutting a piece of fabric doesn't seem like much of a project, so I decided to put a border on it. Rayon is a very slippery fabric and a stretchy one as well. Since I don't know any better, the best thing a novice like me could hope to do in just one evening was a faux border. And this works with any fabric that doesn't unravel too.

Set your machine to a short and slender zig zag stitch and top stitch about an inch from the edge all the way around. It's simple and it's completely brainless, but it gives an otherwise unfinished piece of fabric a completed look. For fabrics that aren't so stretchy, a straight stitch would be fine, but I needed a little bit of give to prevent the rayon from puckering up and that's why I think a zigzag works a bit better in this case.

Wednesday, May 4, 2011

Day 124 and Ramen


I had originally called this True Moebius, but when Kevin mentioned that the stitch pattern looked like ramen noodles, I couldn't disagree at all.

This was my very first attempt at a true moebius piece of knitting and it was really fascinating to see how it knitted up. If you know the moebius cast on, the only other thing you need to know are knits, purls, and cast off.

Ramen

1 ball Katia Samoa
Size 13 needles, circular, 48 inches
Tapestry needle
Stitch marker

Using the moebius method, cast on 90 sts. (Remember, only count the stitches on the top needle)
Carefully spread the stitches around the needle.
Round 1: Knit every stitch. PM
Round 2 et all: Knit1, Purl1 around. Pass marker. (repeat this row until you're near the end of the ball. Save enough to bind off 180 sts.)
If you counted your stitches properly, this will make a continuous seed stitch and to be honest you don't really need the marker unless you're adamant about keeping both "sides" of the round even.
BO in your prefered method. I find a stretchier cast off is the most attractive of for a standard cast off, use a needle at least one size larger.

Tuesday, May 3, 2011

Day 123 and the Bolero


OFFICIALLY PASSED 1/3 OF THE WAY THROUGH THE YEAR!
Yaaaay!

Sorry, got excited there for a minute. So the other big announcement is I finally bought a new camera!!! YAY!! But it won't be here for at least a week. Boooo. Oh well. I know that much better pictures are in my future and I'm pretty thrilled about that.

As for today's scarf, I'm still thinking up ways to make the crummy tube that comes out of the toy knitting machine more special. This time I separately knitted a very small rectangle and sewed it into a tube. Using it as a holder holds this shorty scarf in place like a bolero necktie. I suppose the hand knit piece could double as a napkin ring haha!

Monday, May 2, 2011

Day 122 and Socks


Sock yarn is wonderfully resilient and many brands have a little bit of elastic or nylon for stretch. I think it gives a lovely bouncy feel to the yarn that needn't be over worked.

This scarf is a very easy stockinette stitch strip made from sock yarn. The stitches are smaller than most of the scarves I've done so this is one project you couldn't fit in just a day. I always have a couple projects going at a time so I'm sure I'll have something to show off the next day. I did a bit of garter stitch on each edge and while I could block this flat, I think the way the garter causes it only to fold and not to curl is rather attractive and even emulating a rugby scarf. (I don't think it's an actual term, but it's what I use. To me it means a scarf that exactly matches a rugby sweater and they usually come as a set)

Sunday, May 1, 2011

Day 121 and The Whole Nine Yards


Maybe that's an exaggeration. But it certainly only took about 19 yards of some Lion Chenille Thick and Quick to make this collar style scarf. The key to getting the most out of your last little bits of yarn is efficiency! I've had this gauzy neckerchief for a while, but I can't remember the last time I wore it. I decided adding it to this too short bit of knitting would turn two pieces of non-functional fabric into one piece of repurposed love! Best of all, I managed to use a very very small amount of scrap yarn saving it from the bin as well as making a scarf that didn't cost a single dime and barely took a lick of time.

7 stitches wide and only about 20 inches long, this is nothing more than stockinette stitch on size 19 needles. The stitches are loose enough to thread the unloved kerchief through any stitch I so choose. For this photo, I threaded it through the center stitch at each end of the scarf and just tied a bow. I could also have woven it in and out the length of the knitting and just tucked the ends through each other for a different look.