Friday, September 30, 2011

Day 274 and Which Way?


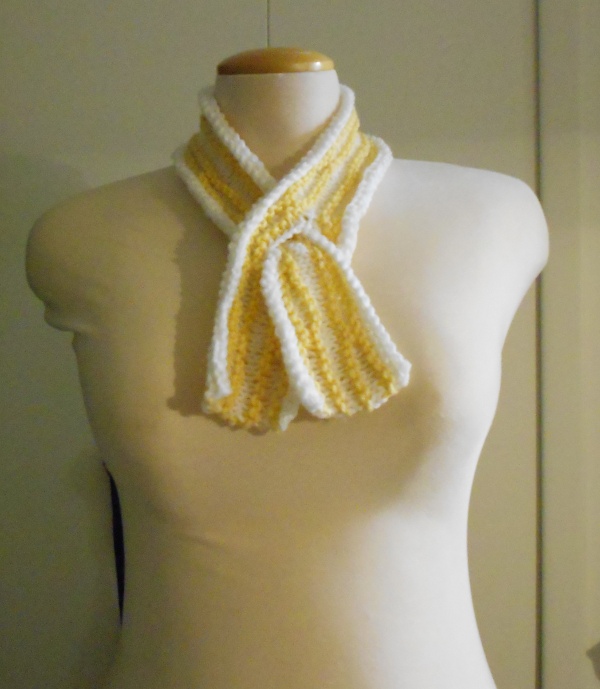
I wish I had more of this yarn. It was an unidentified yarn that I was gifted for the sake of the project and I couldn't love it more than I do.

I used what I call for lack of a better term "offset filet crochet." There's no reason that the grid has to line up like perfect little squares. The cells could just as easily be offset like bricks on a house or switching from even to offset in order to better represent the picture that one is trying to represent. Hmmm, now that I think of it, I see no reason that the cells have to be square or even rectangular! I think that might be something to look into for a future endeavor.

As for this one, I just did something pretty simple. Arrows all in one direction look like they point in opposite directions when worn around the neck.

Thursday, September 29, 2011

Day 273 and Riboflavin


Weird name, huh? It's the first thing that popped into my head when I tried to title this one. I don't think it makes sense and I'm perfectly okkay with that.

What we have here is a giant chain, but after every third chain, a slip stitch is made at the base of the chain. It's essentially a scarf made entirely out of picots. Just imagine I'm shrugging. It was kind of a bad brain day! XD

Wednesday, September 28, 2011

Day 272 and the Paper Fan


I can't remember ever doing this outside of elementary school, but surely it's familiar to just about everyone. Remember back when you were very young and it was a very hot day and sitting in school was unbearable because most schools weren't air conditioned at the time. You took a piece of notebook paper, folded it like an accordion, and had yourself a little paper fan to wind away your sweat.

This is the basic method for this scarf. I had almost no fabric left of the fleece, but it was just long enough to be a scarf if there was something to secure it. I made an accordion fold and used my scissors to make a hole all the way through the layers and did the same thing at the other end. I then threaded some I cord through the holes and tied a little bow in front. It would be a good place to substitute ribbon or a shawl pin if it's on the longer side. It looks a little like a heavy scouts kerchief, doesn't it?

Tuesday, September 27, 2011

Day 271 and Sadie


I love a fast easy knit that looks anything but plain!

A single garter stitch rectangle (I believe that you can use any omnidirectional reversible pattern to the same effect) is folded in an unusual way so that the points remain in tact without any decreasing or increasing. I recommend this blog post on Fabricolage for a very good visual description of the fold.

Monday, September 26, 2011

Day 270 and Dad


This is some serious crochet cabling! It's not hard and I highly recommend the method.

Here's the gist of it. Short stitches make up the background. Long stitches are made around the posts of the stitches 2 rows below and stand above the surface. You can stitch around posts further to the left or to the right to get angled cables and even cross the cables. It's completely a different technique than knitting but the look is just as detailed.

Here's the pattern from the ravelry database: Crochet Cables Scarf
and here's my own project page.

Sunday, September 25, 2011

Day 269 and Raglan


I think this would qualify as a dickie. I loved the giant cowl I made about a week ago most of all for the way it opened up and made room for the shoulders without stretching or curling up and the key of course is increasing!

I recommend this highly as a gateway to sweaters for beginners or as a very speedy giftable. It's basically the beginnings of a raglan sleeve top down sweater and could easily be modified into it.

Loops and Threads Incredible (held double) one skein
Size 15 needles, circular
Tapestry needle

PM: Place marker
SM: Slip marker
M1R: Insert left needle from back to front below the ladder between stitches of the previous row. Knit the stitch.
M1L: Insert left needle from front to back below the ladder between stitches of the previous row. Knit the stitch.

Cast on 44, place marker, and join in a circle. Be careful not to twist the cast on edge
All odd numbered rows: Knit around
Rows 2, 4, 6: purl around
Rows 8, 10: Knit around
Row 12: Knit 5, *PM, K1, PM, K10* 3 times PM, K1, PM, K5
#Even rows 14- 24: *K to marker, SM, K1, SM* 4 times, K to end of round.
Rows 26, 28: Purl around
Complete row 29, then bind off in purl.

If you'd like to make this even longer, work more of the row marked with the # sign.

Saturday, September 24, 2011

Day 268 and Rainbow Mosaic


I've done traditional garter stitch mosaic knitting before with Treaty and yesterday I did something very simple with Linkies. I've been working on this one for a while and I don't think I could be more thrilled with the results.

What's special about this scarf is the way a solid background makes a colored foreground come to life. Any solid would work as long as it has high contrast with EVERY color in the changing yarn. I've found that if the colors come too close together at any point it tends to muddle the entire pattern so make choosing colors a very deliberate time in your own design.

This pattern is on Ravelry as mosaic scarf and you can see the details of my own color choices on my project page here.

Friday, September 23, 2011

Day 267 and Linkies


I love mosaic knitting! I love being able to make colorwork without actually holding two strands of yarn at once or even three or more!

This was a simple one and the slip stitches were carried up three rows causing a little bit of a pucker making each little chain look a little more chainlike.
Here's the basic recipe:

2 rows stockinette color A
2 rows garter stitch color B
*1 row knit 6, slip 2 with yarn in back,* repeat and end with knit 6 color A
*1 row purl 6, slip 2 with yarn in front, * repeat and end with purl 6 color A
*1 row knit 6, slip 2 with yarn in front, * repeat and end with knit 6 color B
1 row garter stitch color B

I liked it best knit a little bit loosely and only used 2 colors here, but it would look amazing changing color B so all of your chains are different.

Thursday, September 22, 2011

Day 266 and Transitions


I have nothing against block color changes, I just like to plus things a little now and then. When I know I'm going to run out of a color, I like to make a little bit of a transition area so the change isn't so harsh. In this case, I crocheted 2 rows of one color and 2 rows of the new color and alternated a few times before committing completely to the new color.

This is actually a helpful technique to use when making a top down sweater or cardigan when you're just starting to get iffy and worried about your yardage making it all the way. Using a contrast and making some stripes before the change makes your item look as if it were designed that way instead of an emergency desperation move. It works great as long as you're working in the round or in rows. If you're using a modular design, I'm afraid you're on your own.

Wednesday, September 21, 2011

Day 265 and the Pinecone


Here in the states fall is quickly creeping up on us.

The technique I learned here was making a hem, but I did it in a bunch of places all around the cowl. It's actually really easy to do! If you've ever done a three needle bind off, it's pretty much the same thing, but instead of a live stitch you're picking up a purl bump from a few rows below. Interestingly, as bumpy as the outside looks, the inside is completely smooth.

Tuesday, September 20, 2011

Day 264 and Billow


By doing some serious cinching in at the top and bottom and including a little bit of increasing and decreasing one gets quite a lot of extra fabric causing... wait for it... billowing around the neck! Interestingly one stays comfortably warm with a lot of air around the neck as with a tightly snugged scarf or cowl. I'm not sure why that is except to guess that the trapped air holds onto heat better than one would think.

Monday, September 19, 2011

Day 263 and Target


It's tough being a handcrafter in a big box world. Not all of us have the resources and the financial security to completely rid ourselves of the huge corporations that stamp out independent design. Let's face it though, they aren't entirely bad. There are plenty of big corporations that do many nice charitable things for society too. In every case, there is an upside and a down. If nothing else, we can really stick it to the man with a little artistic expression!

A few days ago I made Stacks, in which a garter stitch was slightly misaligned to give the impression of different pieces put together. I used the same idea to actually put different pieces together here! I attached each strip as I stitched with a 50% increase in rows for each stripe. (Basically this means that there are 3 garter ridges for every 2 ridges on the previous color)

If you're having trouble seeing the tongue in cheek man sticking, maybe you'll see it better from this angle! If this logo isn't your style, invent your own logo and wear it proudly.

Sunday, September 18, 2011

Day 262 and Yarn


I've been thinking about future goals. I'm only about one hundred away from the goal that I set at the beginning of the year and I really have been enjoying the accomplishment that comes with meeting goals. I think when I'm finished with the year and I've managed to complete my 365 scarves I will continue making deadlines for myself and will continue finding new techniques to flesh out my appreciation for fiber crafts.

Therefore sometime next year I want to learn to spin. I understand the concept of spinning. Twisting things in one direction and then allowing them to untwist around each other creates a stable ropelike structure that won't unravel. As early early practice for my spinning, I made the fringe in exactly this way. Because each of the yarns is so very thick, they have substance enough to hold themselves up giving this otherwise slender scarf a lot of body.

Saturday, September 17, 2011

Day 261 and Kermit


A little triangular edging reminds me of a favorite fictional character! This one came from ravelry and it's a free download so feel free to make one of your own.
I abbreviated mine for lack of yardage but I think it looks just as sweet.
Little Elf Cowl

Had Kevin the Fiance take the photo today. He choose the more daring angle look. Rather exciting, no?

Friday, September 16, 2011

Day 260 and Party


This is the kind of thing that the life of the party wears. It's scrappy, it's loud, it's fluffy, it makes the wearer feel like they're that much more fun. It's also easy, fast, and perfect for when you have lots of yarn and no tools.

I took 17 different but coordinating bits of novelty and smooth yarns from my stash and held them all together as if they were one giant yarn. There was fur, glitter, barberpole, feather, ribbon, and who knows what else. I tried to focus my colors on black, pink, and rainbow just so it would look a little more deliberate. I used my fingers to make a slip knot and then reached into the slip knot and pulled through a loop. Reach into the new loop and pull out another loop. Keep doing this until you've got a fat ropey scarf as long as you want it to be, cut all those ends and pull them through. The tail on mine was substantial enough to call it a fringe all by itself!

Thursday, September 15, 2011

Day 259 and Convenience


This is just a stitch pattern, but it's so useful! I love garter stitch because it's so very easy and I can quite literally do it with my eyes closed. Let's say I want to make a cowl or a scarf for a young person that I know. By using vertical columns of garter, reverse garter and garter again, I can make something that will grow with the small person. Garter (all knit) and reverse garter (all purl) side by side give the illusion of a seam without the inelasticity of it. Because it looks so much like a seam there's nothing to stop you from seaming up another stripe of garter right next to it to add width or depth depending on how you're wearing the item. And let's say you started with a single color that happens to be a favorite sports team color. You have a place to seam in that team's contrast color and making it look intentional in the first place.

It's the simple things in life that really make us happy :)

Wednesday, September 14, 2011

Day 258 and Bricks


It's a little tricky to see the texture on this cowl, but it changes direction every few rows. For a brick's worth of fabric I worked in horizontal rows and then for the following brick I switched to vertical rows connecting the pieces at the end of each row. It's partly modular, but also all one piece. Next time around I think a more heavily self striping yarn would make the construction a little bit clearer.

Tuesday, September 13, 2011

Day 257 and Wave


I know I've mentioned a few books in passing as inspiration or as stitch dictionaries that I particularly enjoy, but there are plenty of books out there that are dedicated specifically to the accessory to which I'm bound for another 98 days.

Hooked Scarves: 20 Easy Crochet Projects is where I plucked this pattern. It is meant to be made with a much larger needle and much larger yarn, but shrinking it down still gave a nice size. As for the book, it is true to its name. The chosen projects would all be excellent for a beginner or an ambitious beginner with a focus on making something wearable and making it right now. The stitches stay relatively basic and the tutorial section of the book has a great many photos that are clear and colorful. The scarves themselves range from fun and funky to professional and sophisticated. My opinion? I approve! :)

Monday, September 12, 2011

Day 256 and Interest


I'm the first person to cry out on the side of restraint. Novelty yarns are like Elmer's Glue; a little dab'll do ya. (My kindergarten teacher's mantra!) In this case I took what would otherwise be a boring cowl and gave it a little bit of interest.

You'll need:
Size 17 needles
Size M crochet hook or a latchhook
Sport weight yarn held double 4 oz for a cowl, 12 or much more for a scarf.
Tapestry needle
Scraps of your chosen novelty yarn- nothing thicker than aran or worsed weight

Cast on 14
All odd rows: Knit across
Rows 2,4,6,8,10: Knit 5, Purl 6, Knit 3
Rows 12, 14, 16, 18, 20: Knit 3, Purl 6, Knit 3

Repeat these rows until you're happy with the length of either your cowl or your scarf. For a cowl, graft the ends together. Using your hook and the novelty yarn reach through the scarf fabric and chain a single line zigging and zagging the direction of the chain as you see fit.

Sunday, September 11, 2011

Day 255 and Navaho


Navaho is a term used in spinning. When a single ply is chained through itself not unlike crochet in order to ply with itself without the use of another ply. Search Navaho plying on youtube for many many demonstrations. I only borrowed the idea here by making a very long chain and using the chain to knit quite large stitches. The result is a very think "yarn" that remains incredibly lightweight thanks to the large amount of empty space. Yet it retains the look of something much more solid. While chaining took some time to make enough yardage for a scarf, the large knitting more than makes up for the time usage and the weight makes it so comfortable that I highly recommend this method for last minute gift ideas!

Saturday, September 10, 2011

Day 254 and Trinkets


This is very simply many many crochet chains stacked upon each other. At one spot in the cowl I anchored them with a lone single crochet stitch just to keep them all the same length. It's much the same as wearing a whole flurry of necklace chains but much more comfortable and without the pinch at the back of the neck when the links catch a lock of hair.

Friday, September 9, 2011

Day 253 and Snug


A cowl can be many things. This one seemed a bit too shallow when left to hang- more like a fat necklace than a scarfthing- but happily it doubled up into a very snug and certainly warm chunk of a cowl. I was going for something a little more lacy, but all the more reason to try and try again!

Thursday, September 8, 2011

Day 252 and Climbing


I'm getting to that point where thinking up a title for a scarf is getting harder than thinking up a design or executing the design of a scarf. I figured this would be the one where I just hung back on the name. It's another cowl in the list but it's another cowl that continues to make that number go up...climb. I've been working on a tougher stitch pattern than this that will take me a while to complete, but cable crochet is something I've never really tried. It's not as tricky as it looks, but it can easily be so if you start getting really complicated. swatch swatch and swatch some more before diving into a big project!

Wednesday, September 7, 2011

Day 251 and Gauge


I was playing with my stash and found a long lost purple that I loved. I figured I'd funk it up a little with some fur yarn (in small amounts of course otherwise one risks the tacky) but as soon as I dropped the fur yarn to continue plainly, I got the ugh. Ugh! It's so loose! Ugh! It's so flimsy! Ugh! The stitches are so hard to keep even!

Well I underestimated the thickness that the fur would add. I always had used it as a "carry along" yarn but had nearly always carried it along the entire way. Also most "carry along" yarns can be as thin as crochet cotton and don't change the gauge at all! Troubleshooting ensued.

Turns out the solution was pretty simple. Change the stitch. I was using (amer) DC for both yarns together and each stitch was fat and ample. When I dropped the fur yarn, I dropped the girth of the stitch. I compensated by making a fatter shorter stitch for the plain section and made the chain NOT count as a stitch. This made the width seem even closer to the DC section. A Half double stitch still wasn't making perfect gauge, but the difference was now negligible instead of blaring!

Worsted weight smooth yarn
fur/eyelash yarn
size M hook
needle for tails

This is a recipe for my own scarf, but the following row instructions can be worked in nearly any order.

Both yarns held together:
Beginning row only: Chain 12. DC into the 4th and every following chain.
Row A: Chain 3, turn. DC in the second and every following stitch across (the turning chain counts as a stitch here except after an HDC row.)

Cut the fur yarn. Work with the smooth yarn held alone.
Row B: Chain 2, HDC into the first stitch and in every stitch across including the turning chain.
Row C: Chain 2, HDC into the first stitch and in every stitch across NOT including the turning chain.

My scarf was as follows. Beginning Row, A, *B, 9 of C, 2 of A* repeat the row sequence between the stars until you have a satisfactory length. Kind of tricky instructions here. The gist is that you're working in stripes with DCs for double yarn and HDCs for single yarn. In DC the turning chain is a stitch, but in HDC the turning chain is not a stitch. Have at it! :D

Tuesday, September 6, 2011

Day 250 and Tight Fisted


You have to work with what you have. If you've got a stash and I know you do, it's important not to hoard it all. Use it! Love it! Enjoy it! As much as I love a skein of yarn I will always love it more as a wearable or household item.

This was from a skein that I have planned for another project, but I knew ahead of time that I had purchased WAY more than I needed. I suppose you would call this pre-stash busting.

All I did was make a thin strip of crochet three times longer than I wanted this cowl. I braided it around itself and connected the final strip and called it a day! The hardest part was the actual braiding. You can find tutorials about making a braid out of a single strip in various tutorials all over the net and it's most often called the "Sailor's Knot." That's your best bet search term right there.

Monday, September 5, 2011

Day 249 and Everywhere


It's the little things that make us special. It's the little things that make our hometown or our school or our hobbies special. It's the little things that make the things that we like special.

A little thing like a piece of fringe can make a boring scarf into a special scarf. In my world it's very rare to have too much of a good thing so I figured I'd add that fringe all over the place!

Easy recipe! Chain as many as you want (as you can see, I made a super long scarf this time). DC into the 4th stitch and every stitch across for every row for as wide as you'd like your scarf.
The real excitement is adding the fringe. Cut many many lengths of fringe and go to town! Use your crochet hook and latch them in anywhere you think feels good. I made a sort of broken zig zag pattern with mine and I made them quite long (9 inch cuts). I used all the same color, but lots of scraps would look fun as well.

Sunday, September 4, 2011

Day 248 and Weightless


I was interested in doing another ruffly type scarf, but they can be bulky if not done right. If you want to wear it as an accessory and not as cold weather gear, you have to plan ahead. I had a very light fingering weight mohair wool blend in my stash. Mixing that with the easiest of easy increase lace crochet lace gave me lots of twisting ruffles in no time at all!

(American terms)
Size K hook
250 yards fingering preferably with a thick halo
tapestry needle

Begin by chaining any number (make the chain precisely as long as you'd like the scarf.
Row1: DC into the fifth chain from the hook, *chain 1. DC into next stitch* Repeat until the end of the chain.
Row2: Chain 4, turn. DC into the very first stitch, ch1. *DC into the next DC, chain 1, DC into the same DC, chain 1* Repeat until the end of the row.
Row 3: Chain 4, turn. TC into the very first stitch, ch1. *TC into the next DC, Ch1. TC into the Next DC, ch1, TC into the same DC, ch1* Repeat to the end of the row omitting the final chain 1. Cut the yarn and weave in ends.

Saturday, September 3, 2011

Day 247 and Confetti


This is a fantastic project to do with kids because there's no wrong way to do it and young creativity is so refreshing to watch as it happens!

Make yourself a plain jane scarf. I used double crochet the long way, but stockinette in knitting would be fine and single crochet would look nice too. It's important to use acrylic yarn because the color is added with sharpie markers! Permanent markers aren't always permanent on natural fibers, but they stick fast on most synthetics. The idea here is to just have at it! I grabbed a handful ad made spots everywhere, but if you or your little ones feel inclined to draw a picture, write a name, commemorate a date or anything at all, it will make your scarf all the more special. If you're really daring, this would be an excellent project to make many multiples of and have as a favor at a party (putting this much work in, I'd save it for the most special of parties such as Thanksgiving or Christmas).

Friday, September 2, 2011

Day 246 and Pimiento


I loved making this! It was so easy and yet so handsome. It's easily unisex and with careful color choices could be a present for that picky gentleman in your life. Here's the blog which so generously offers this pattern for free. What you see is actually an afghan pattern, but an afghan is just a really really wide scarf ;)

Thursday, September 1, 2011

Day 245 and Watermelon


I've had this yarn in my stash for it seems like ever. There comes a time when every stash lover needs to make a decision. I like to make one year the cut off time. If you haven't used the yarn in a year then you need to either pick a project and use that stuff up or send it along to someone who WILL use it via thrift store or garage sale. It's not fair for the poor yarn with all the potential in the world to just sit around dreaming of the day it will be a garment or accessory. Give the poor string a break and let it become something.

Worsted weight yarn (mine was a cotton tape style) about 200 yards
size K hook
tapestry needle

Chain 139 (or any multiple of 3 + 4 stitches)
Single crochet in the second and every following chain.
Row 1: Chain 3, turn. DC into the second stitch, *chain 1, skip one stitch, dc into the next 2 stitches* repeat to the end of the row.
Row 2: Chain 1, turn. *SC once into each stitch and once into each chain space.* to the end of the row.

Repeat these two rows. I changed colors after every other row and carried the opposite color up the side. This would also look nice with many different colors. I maintain that the best place to start a new color with with row 1.

Cut the yarn, sew in ends, enjoy :)